What Is a Risk Register, and How to Create One
Last Updated: May 6, 2025
Managing risk without a clear system in place can be challenging. Confusion, missed opportunities and costly surprises are just some of the consequences that may follow. However, a risk register can turn things around.
With a well-designed risk register in place, you get more than just a documentation tool. You can establish a consistent and structured method of identifying, assessing and managing potential risks across your organization. It brings much-needed structure to a risk management process, but only when done right.
Below, we explore what a risk register is and how to create one. By the end of this detailed guide, we hope that you’ll be empowered to develop an effective risk register that supports informed decision-making.
Table of Contents
What Is a Risk Register?
A risk register or risk log is an important project management tool that helps organizations identify, evaluate and address project risks throughout a project’s life cycle. You can think of it as an organized list that highlights potential risks, helps you assess their priority and outlines relevant strategies for mitigation.
Risk registers in project management are important because organizational challenges are a given. From technology shifts to unpredictable customer preferences and labor shortages, these are just a few everyday examples of challenges that many businesses face. Having a risk log is essentially your way of empowering your team to anticipate risks and ensuring their reaction will give your organization the best possible outcome.
Key Elements of an Effective Risk Log
Developing an effective risk log involves four key elements:
- Risk identification: This is where you name the risk to ensure everyone knows what it entails and assign a unique identification (ID) number to make tracking and referencing easier. You can also provide a brief description that includes the nature of the risk and its implications.
- Assessment: This involves evaluating the likelihood of the risk occurring and its potential impact on the organization.
- Response: After identifying and assessing the risk, it’s essential to create a risk response plan with mitigation strategies that your team can follow should it occur.
- Ownership: Every risk should have a designated owner who will continually monitor, manage and report on its status.
Benefits of Using a Risk Register
Implementing a risk log isn’t just a “best practices” approach. It’s a proactive approach to give your team a strategic advantage in multiple areas:
- Project risk management: When you identify potential risks early on in the project, you can also identify solutions and build these into your project plan.
- Improved decision-making: With a risk log, there will be no guesswork. It gives project managers a clear outline of what to do when a risk occurs.
- Documentation: As your team identifies, analyzes and creates risk response plans, they must work from one central point to centralize documentation and avoid any potential miscommunications.
- Enhanced communication: Risk registering allows your team to work together to identify risks and find solutions to these risks. They may also use collaborative tools, all of which can help improve communication in the team.
- Accountability: When you assign owners to the risks, you ensure that the right people can work on and follow the response plans.
How to Use a Risk Register
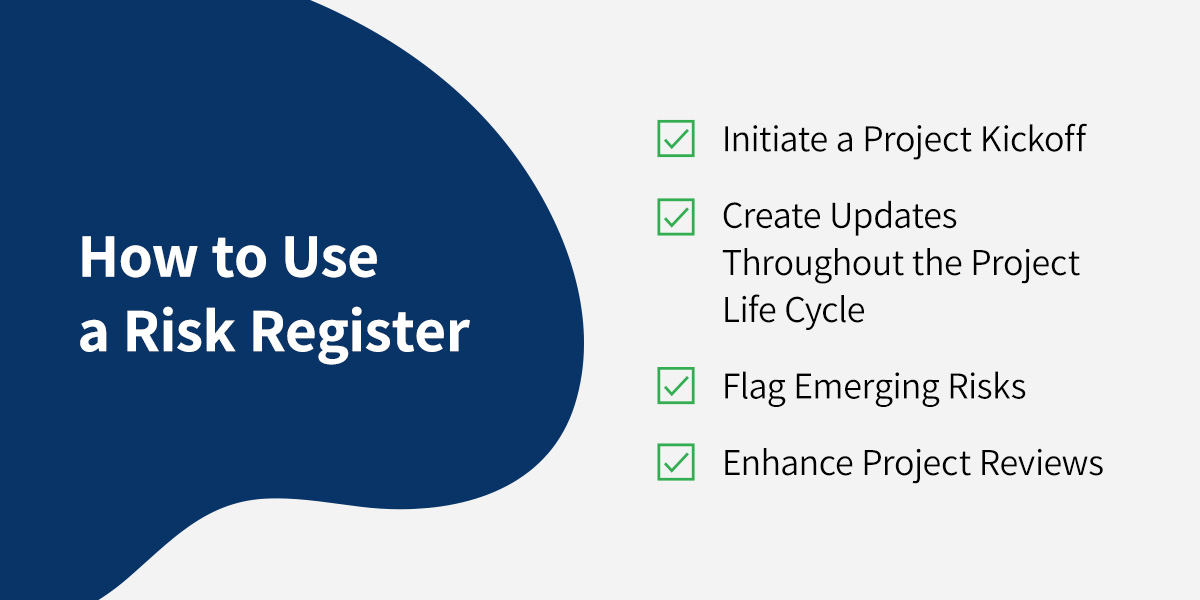
It’s best to use a risk register from the very beginning of a project and continuously update it throughout every phase. You can use it in multiple ways:
Initiate a Project Kickoff
During the planning phase, it’s important to identify potential risks that could impact the project’s success. For example, in a construction project, the risk manager might log risks related to safety regulations, unexpected weather conditions or delays in obtaining building permits. By documenting these risks early on, the team can develop strategies to overcome them.
Create Updates Throughout the Project Life Cycle
As the project progresses, some risks may be resolved, and some may change. It’s essential to regularly review the risk log to ensure it is always updated on the current status of identified risks.
Flag Emerging Risks
New risks can arise at any point in a project. The risk log can help you develop an early warning system to flag these emerging risks. Another risk register example can be for an IT company that’s preparing for a product launch and gets challenges with third-party integrations. The risk log can flag potential delays early and help the team identify alternative integration options.
Enhance Project Reviews
Integrating the risk register with your regular project reviews can help you keep all stakeholders informed. It creates transparency and can help encourage collaboration in addressing risks.
Risk Register vs. Risk Report
Both risk registers and risk reports are essential tools used in risk management. However, they serve different purposes.
A risk register has:
- Detailed information on potential risks, including their description, likelihood of occurring, impact on the business and your planned responses to these risks.
- Regular updates that reflect the current statuses of each risk.
- A wide variety of entries, from high-level strategic risks to small operational concerns. Each of these entries will also have a plan in place to mitigate these challenges.
On the other hand, a risk report is essentially a summary of all the risk-related information from the risk log. It makes the data more digestible for stakeholders who may not want to dive into the details. You can also think of it as a summary of all the most important risks and what’s being done about them.
A risk report will typically include:
- List of key risks identified and their potential impact on the organization
- The progress of mitigating these risks
- Periodic generation, for example, monthly or quarterly
How to Create a Risk Register
Developing a risk register is a step-by-step process that, when followed correctly, can help you quickly identify and mitigate many potential risks.
1. Identify the Risk
To identify potential risks, start by understanding your project’s goals, scope and key activities. Then, ask yourself one important question — what could go wrong?
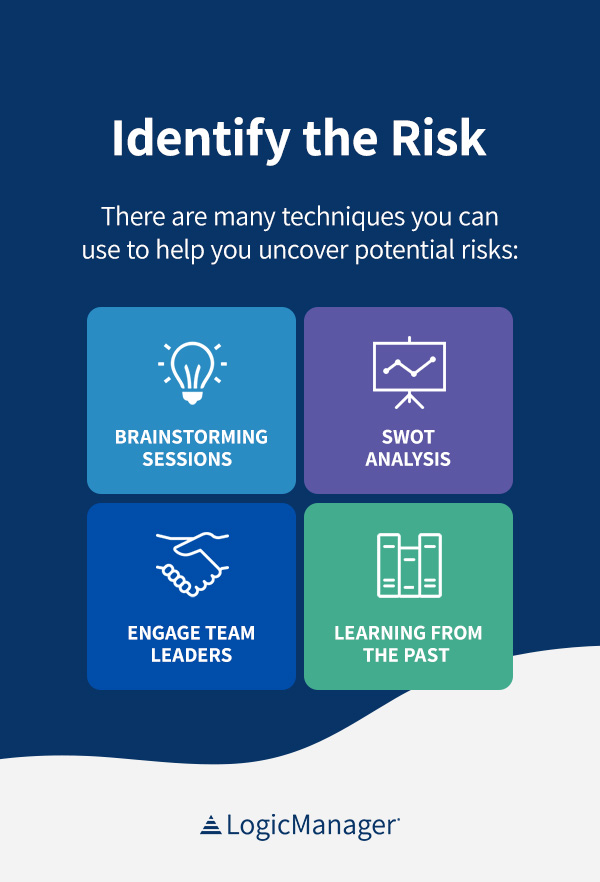
There are many techniques you can use to help you uncover potential risks:
- Brainstorming sessions: Gather your team for a brainstorming session. Encourage open dialogue where everyone can share their thoughts on potential risks. This approach can help you gain a more comprehensive understanding of possible challenges.
- SWOT analysis: Review your strengths, weaknesses, opportunities and threats (SWOT). This can help you identify internal and external factors that can be risks.
- Engage team leaders: Involve different team leaders to help you gain diverse perspectives on potential risks.
- Learning from the past: Review past projects, industry benchmarks and lessons learned. This may help you uncover a common risk pattern.
A software-as-a-service (SaaS) model for risk management, like LogicManager’s enterprise risk management (ERM) features, allows organizations to configure a scalable solution to identify and manage risks.
Once you’ve identified the potential risks, it’s essential to clearly describe each and its potential impact on the project and organization. You’ll also need to allocate a unique name identification date to make tracking the risk easier throughout the project process.
2. Assess the Risk
In the previous step, we listed every possible risk. However, not all risks are created equal. This stage in creating a risk log is about understanding how likely a risk can occur and how serious the consequences would be if it did. This phase helps you know which risks need the most attention.
Begin by evaluating each risk based on the factors of likelihood and impact. You can use a scoring system of one to five for each risk — one for very unlikely to occur or negligible impact, and five for almost certain to happen or catastrophic impact. For example, consider a risk related to a software bug discovered late in the development stage of a new app. You might assess it as follows:
- Likelihood: 3
- Impact: 4
Next, you’ll want to calculate the risk rating by adding the two scores. This will give you a numerical value that helps you quantify the risk. Using the previous example:
- Likelihood score: 3
- Impact score: 4
- Risk rating: 3 + 4 = 7
After calculating your risk rating, you’ll need to prioritize the risks. Group them based on their scores. For example, low risk (1 – 3), medium risk (4 – 6), High risk (7 – 9).
The last phase of assessing your risks will be to outline the immediate responses for each category:
- Low risk: Monitor the situation and keep an eye on any changes
- Medium risk: Develop a response plan to mitigate the risk
- High risk: Implement immediate measures to address the risk
3. Categorize the Risk
Categorizing the risks helps to bring structure and clarity to your risk management process. Instead of having to deal with a long list of scattered potential risks, you can categorize similar risks together and make it easier to analyze patterns, prioritize responses and assign responsibilities.
To categorize your risks, you can:
- Start by choosing a category framework: Operational, finance, compliance, legal and external are some common categories you might choose.
- Assign a category for each risk: When logging each risk, note the category alongside it.
- Use the categories to filter and analyze: Review grouped risks regularly to spot trends, allocate resources and adjust risk response plans accordingly.
4. Create a Risk Response Plan
Creating a risk response or mitigation plan helps you outline how to handle every identified risk.
You’ll need to develop clear and actionable steps to address each risk you’ve identified. This includes the timeline for implementing these actions, the resources required and any specific conditions or events that would “trigger” or activate the response plan. The plan should also clearly communicate the intended outcome to ensure that everyone understands the purpose of the plan.
For organizations looking to enhance their risk management capabilities, tools like LogicManager’s Risk Ripple software can help. This software automates and centralizes risk tracking, integrating artificial intelligence (AI) to help organizations predict how risks can have a ripple effect across an organization
5. Assign Risk Owners
After identifying, reviewing and prioritizing the risk, assigning a risk owner to it is essential. This is essentially the person responsible for overseeing the implementation of the response plan.
You will need to assign an owner to every risk you’ve identified. The owner needs to understand the impact of the risk in detail. This might include the head person overseeing the risk as well as the additional team members who will address that specific risk.
The risk owners may also need to perform additional research for solutions and then proceed to update the risk log when there’s new information to add.
6. Monitor and Review Risks
The risk owner will need to keep the risk register updated. It should correctly reflect changes or progress on the risks. New risks can be identified throughout the project. These should be noted and included in the risk log if or when they occur. Having a regular risk register meeting is also good practice to keep reviewing and addressing the risks as necessary.
Risk Ripple Analytics helps organizations understand the “unknown knowns,” or how risks are interconnected. It enables you to see the bigger picture and make more informed decisions, such as developing stronger mitigation strategies or reallocating certain resources.
7. Indicate Risk Status
Lastly, it’s essential to indicate the status of each risk. It helps the whole team understand whether or not the risks have been successfully addressed.
You can use language such as:
- Open
- In progress
- Closed
You can also add more details to the status by adding more fields, such as:
- Not Active
- On hold
- Not yet started
The more transparent the risk owners are, the easier it can be for everyone to stay on the same page.
Using Risk Register Templates
A risk register template is a convenient way to bring consistency, clarity and efficiency to your risk management process. Instead of starting from scratch with every new project, you can simply use a template that provides a structured format for capturing all the important details.
Save Time, Ensure Consistency and Reduce Oversights With LogicManager
A well-maintained risk log is one of the most powerful tools for a risk manager. It helps you quickly identify, categorize, assess and respond to potential threats before they escalate. This can help bring structure, clarity and accountability to your risk management process.
Whether you’re running a single project or overseeing multiple risks across the entire organization, having a centralized, consistent solution can help. This is where LogicManager comes in. Our software offers a centralized solution that automates data capture, risk scoring and reporting. The Risk Ripple Analytics feature gives you a better understanding of how one risk might affect the next so you can make more informed decisions, making your risk management efforts more efficient and effective.
Contact LogicManager today or request a demo to learn how we can help streamline your risk management process and better understand your organization’s risk landscape.


